-Written by Rianna Jamieson
Making art can be enjoyable no matter your age or ability! So why should we restrict ourselves to only making art in class or in therapy? This series is all about making art fun again in the comfort of your own home. These crafts are easily accessible and can help re-focus, reduce stress and improve relationships between family members and friends!
This periodic series will include short, simple, and enjoyable crafts with step by step instructions and advice on how to make art more accessible to loved ones in order to make something beautiful.
—
Here at ITA we understand that creating art may seem daunting to those of us who struggle to grip or hold small items. However, as pioneers of creative arts therapy, we see between the lines to find fun, experimental ways to make art!
This craft is suitable and fun for all ages and capabilities! This art sadly won’t last forever, however, the fun is in the making!
* For some tips on how to make paintbrushes more accessible, see the end of this post.
You will need:
- Salt
- Wet glue
- Paper (light colors, ideally white)
- Inks (you can also use watercolor or food coloring)
- A paintbrush
- A sunny windowsill to dry your creation

Step 1
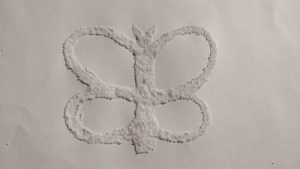
Decide what shape you want your art to be. The shape we are working with is a butterfly.
Paint a thick layer of glue in your chosen shape. If you don’t feel like making a shape, then just draw some squiggles!

Step 2
Shake a thick layer of salt over the glue.


Step 3
Allow to part dry for 10 minutes. Then shake off the excess salt. Keep this used salt in a separate jar or envelope, to use for future paintings.
Step 4
Dab your paintbrush into your ink. Lightly touch the tip of your paintbrush onto the salt. The ink should bleed along the salt line. Be sure not to add too much liquid too fast.
Try playing around with different colors and letting them bleed them into each other!


Bonus Step:
For additional flair, paint extra swirls and dots inside and around your masterpiece.
Leave your painting for minimum 20 minutes in a warm dry place.
The rest is up to you! Switch up colors, types of inks, and patterns.

Bonus Craft!
If you or your loved one struggles to grip and hold onto small objects, this easy trick will make it much easier!
All you will need is:
- A paintbrush
- A tennis ball
- Something sharp to make a hole (e.g. a pair of scissors)
Simply make a hole directly through the center of the tennis ball and out the other end. Be sure to work slowly and safely and stabilize the ball on your worktop.
Push your paintbrush through the center of the ball and that’s it!

Now when you’re working with paintbrushes in future you have a larger surface area to hold, easing the tension in your hand!
As usual, be sure to share your creations with us on social media by tagging us.
Facebook: Institute for Therapy through the Arts
Instagram: @ITAChicago
Twitter: @ITAArtsTherapy